

Solix Lite Guide
3 min read
Introduction
This guide walks you through the essentials: logging in, and setting up your first Building, Floor,
Zone, and Device.
1. Log In
1. Open the Solix Lite portal in your browser.
2. Enter the email address and password provided to you and click Login
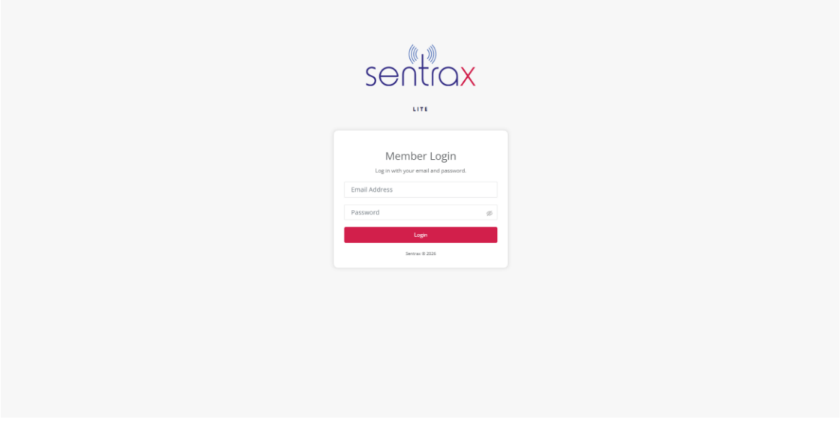
Figure 1: Login Page
2. Dashboard
After logging in, you’ll land on the Dashboard.
1. The top row shows your Gateways, Beacons, and Tags Inventory — how many you have
and how many are currently deployed.
2. Below that, the buildings panel (left) lists your buildings, and the panel on the right shows
the floors for whichever building is selected.
3. Use the navigation menu on the left to move between Buildings, Floors, Zones, Devices, and
the other sections of the portal
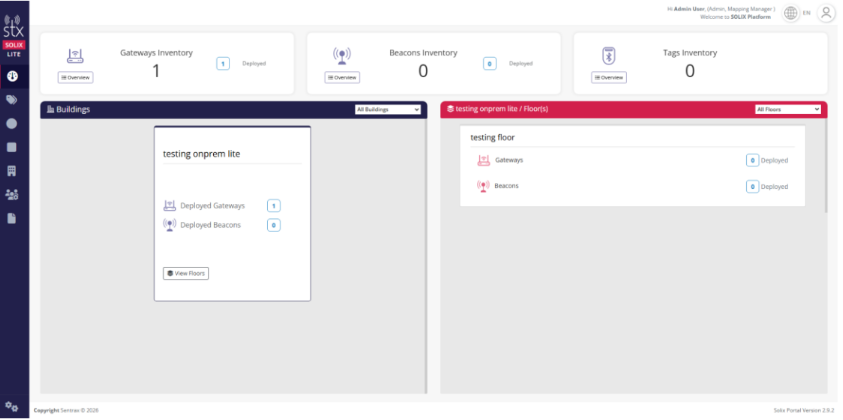
Figure 2: Dashboar
3. Add a Building
Buildings are the top level of your site — everything else (floors, zones, devices) is added
underneath one.
1. From the navigation menu, go to Buildings, then click Add New Building.
2. Type a location into Search Location and click the search button — the map will center on
that area.
3. Click on the map to drop a pin at your building’s location. The Latitude and Longitude fields
fill in automatically.
4. Enter a Building Name (and an optional description).
5. Click Add Buildin
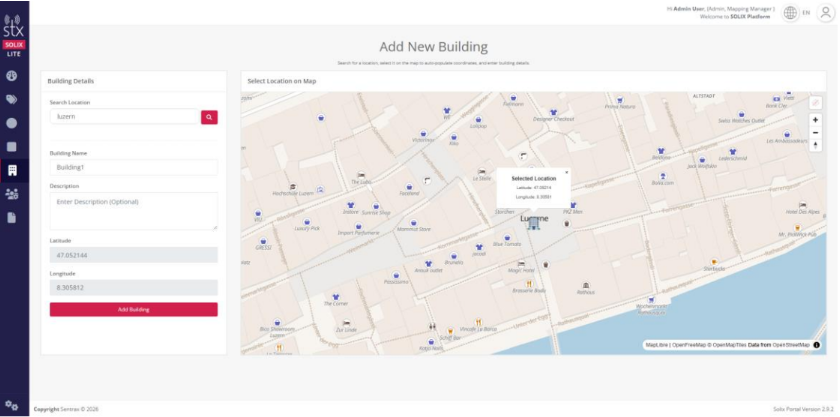
Figure 3: Add New Building
4. Add a Floor
1. From the navigation menu, go to Floors, then click Add New Floor.
2. Select the Building this floor belongs to and give it a Floor Name.
3. On the map, draw the floor’s outline by placing at least 4 points, then closing the shape.
4. Click Choose File to upload your floor plan image — it will overlay on top of the outline you
drew. Use the opacity slider to help line it up.
5. Click Add Floor.
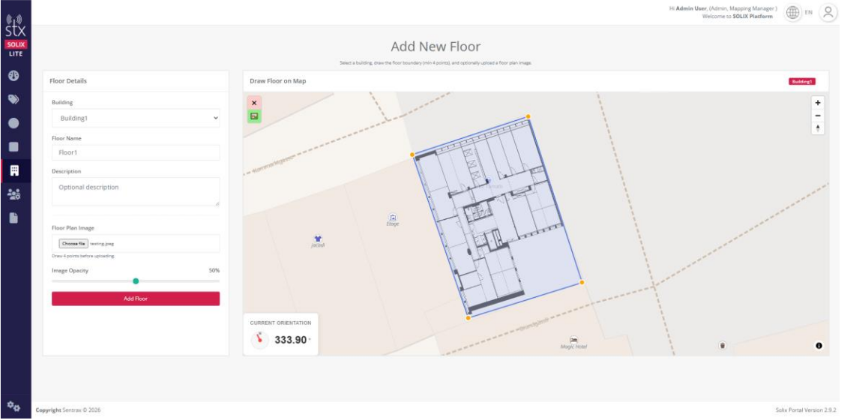
Figure 4: Add New Floor
Note: The first two points you place when drawing the floor set its North angle. If you’re using AoA gateways, make sure their physical 0° mounting direction matches this North angle for accurate
positioning.
5. Add a Zone
Zones mark out an area of a floor — such as a room or hallway — that a gateway will cover.
1. From the navigation menu, go to Zones, then click Add New Zone.
2. Give the zone a name, and select its Building, Floor, and Zone Technology.
3. Draw the zone’s boundary on the floor plan. The portal shows the zone’s area and tells you
how many gateways that size needs.
4. Click Add Zone.
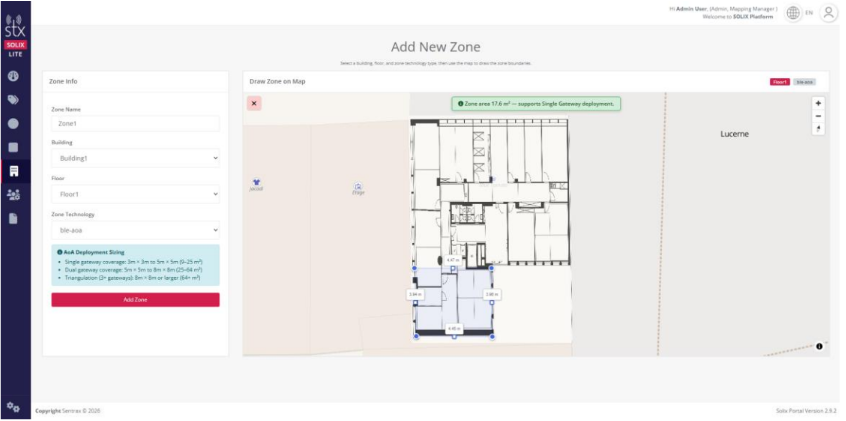
Figure 5: Add New Zone
6. Add a Device
Once a zone exists, you can place a gateway inside it.
1. From the navigation menu, go to Devices, then click Add New Device.
2. Select the Building and Floor, then click inside a zone on the map to select it.
3. Set the Device Type to Gateway and choose the gateway from Select Gateway.
4. Check the Deployment Status panel — it confirms wall clearance, spacing from other
gateways, and mounting height are all within range.
5. Set the Gateway Height and click Add Device.
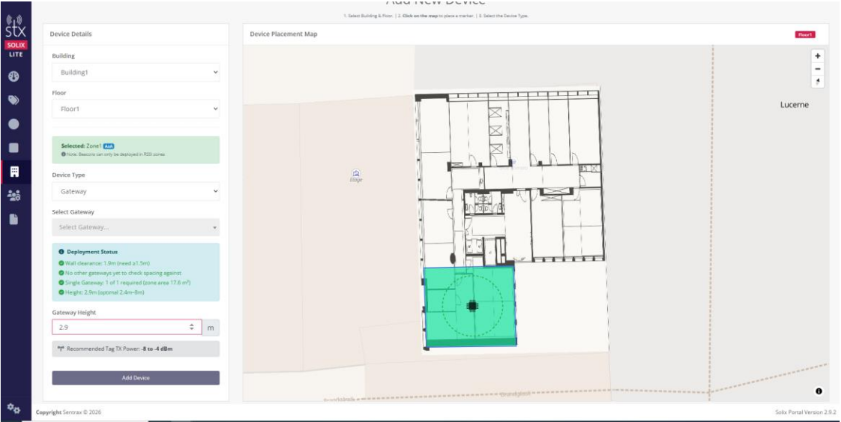
Figure 6: Add New Device
7. Manage Your Devices
All devices placed on a floor appear in the Floor Devices list, where you can review or update
them at any time.
1. Click the edit icon next to a device to open its details.
2. From here you can adjust the Gateway Height or drag the marker on the map to reposition
it.
3. Click Save Changes when you’re done.
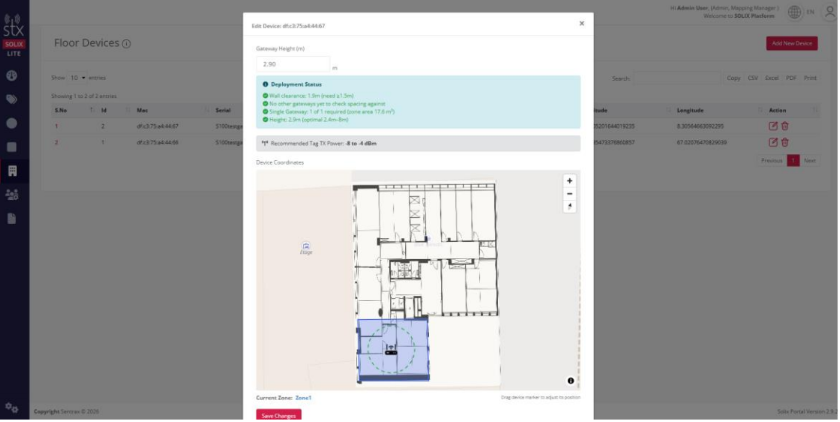
Figure 7: Editing a Device
That covers the core setup flow — Building → Floor → Zone → Device. If you run into any issues, reach
out to your Sentrax support contact.


Powered by BetterDocs